6 Reasons why your chromecast is showing ‘Chromecast not Supported’ error and how to fix them
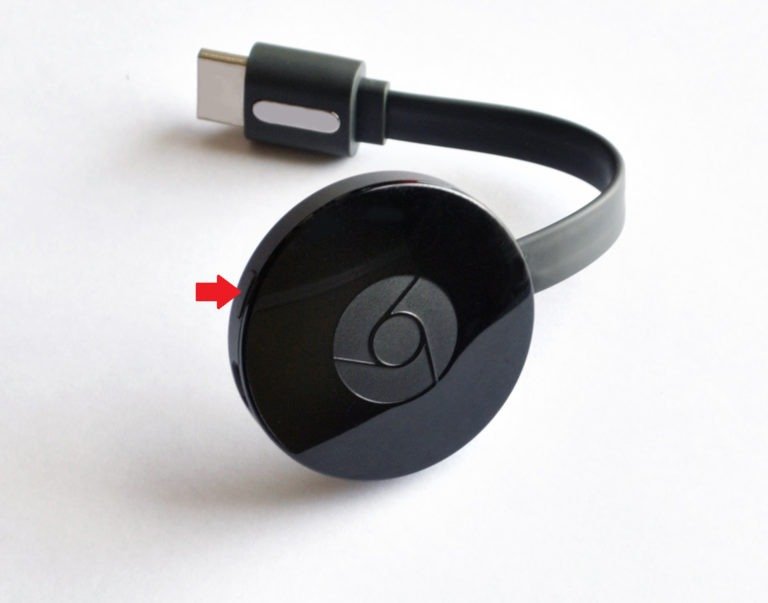
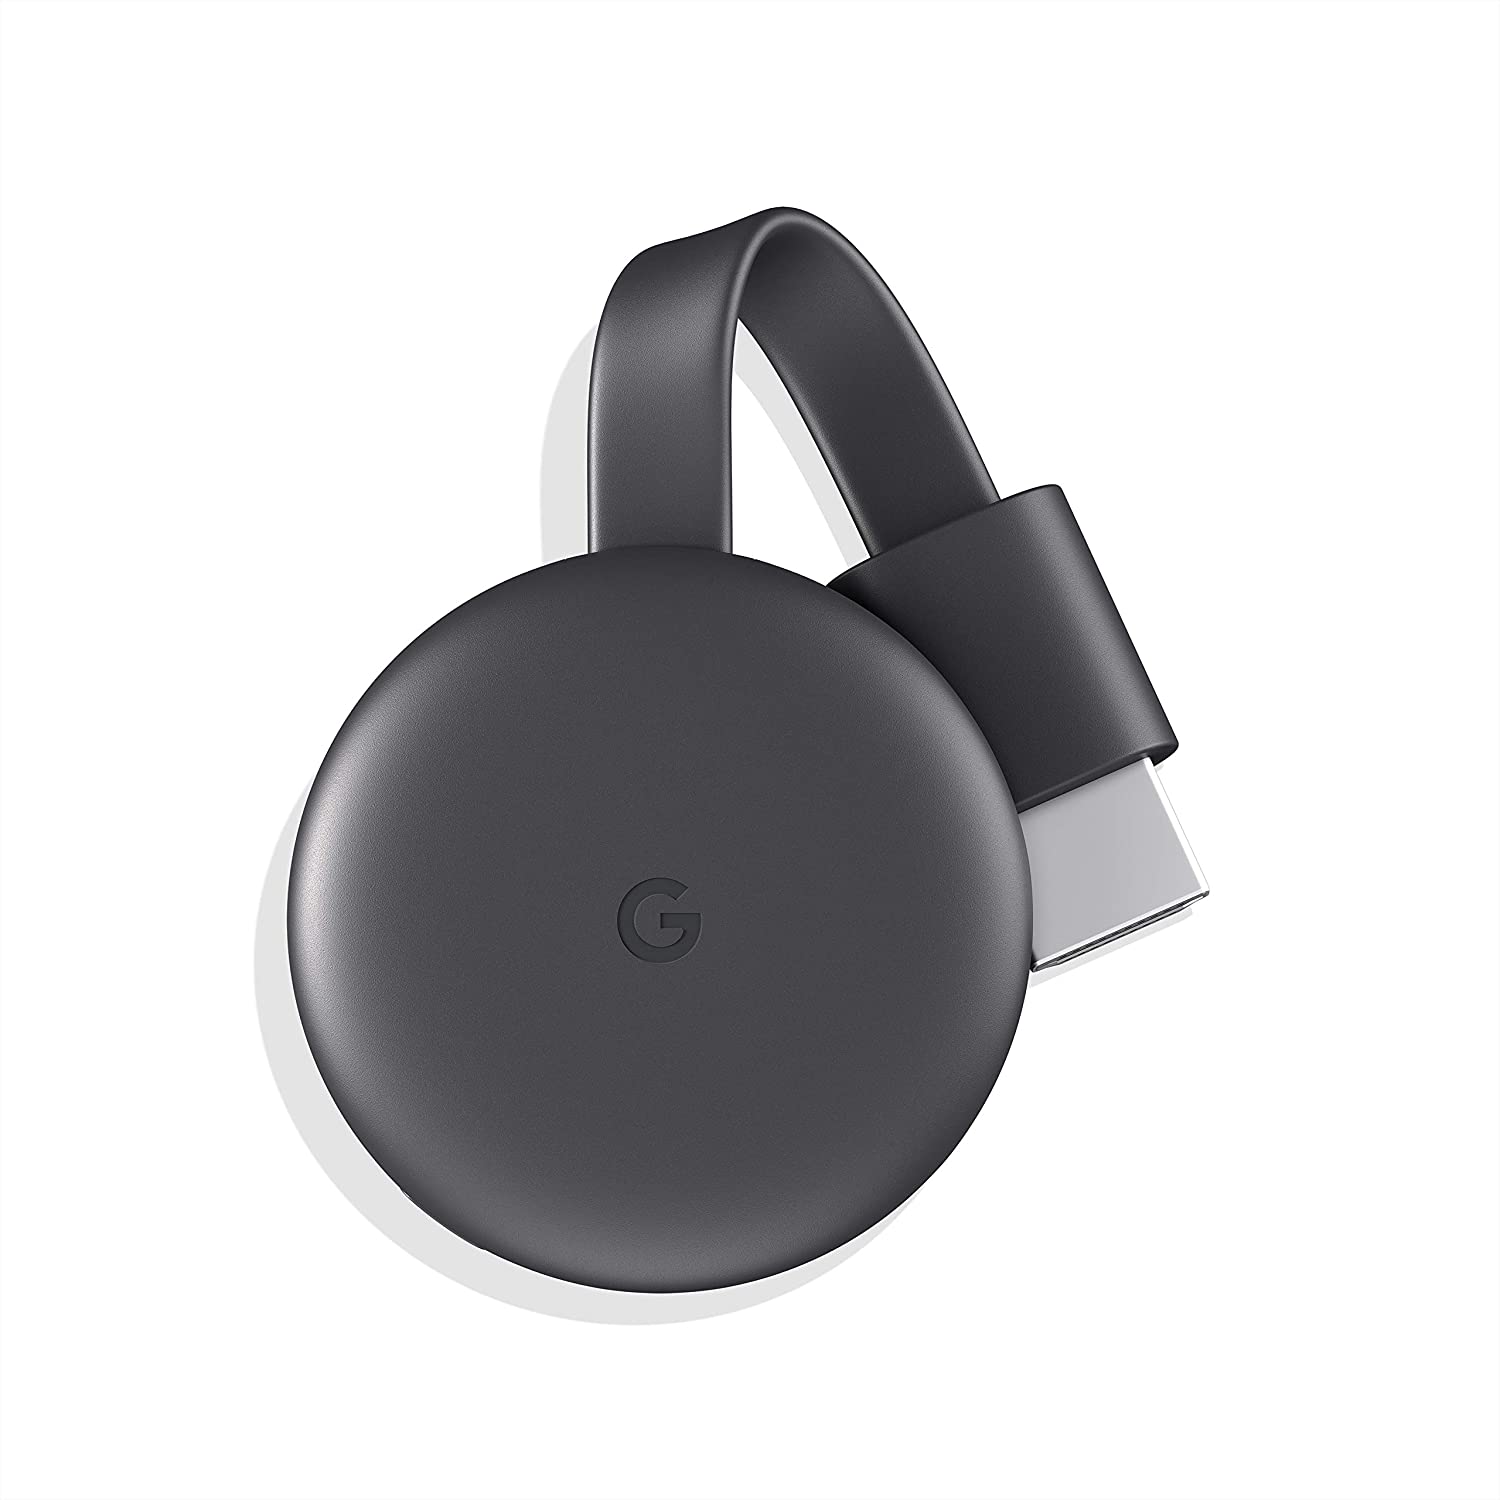 Image Source: Amazon
In today’s day and age, there are a number of entertainment sources. There has also been an introduction of different devices and applications where you can link various different devices for an optimum experience. Products of the same company usually provide a seamless connection between a number of its devices, however, there are other ways to connect external sources as well.
The Google Chromecast device is an example of such a device that can enable a steady connection between your Chromecast device and your TV, mobile device or to your laptop or PC. Chromecast built-in is a technology that lets you cast your favorite entertainment and apps from your phone, tablet, or laptop right to your TV or speakers. Any media playing on your PC would be cast to your TV via the Google Chromecast device.
There are three versions of Google Chromecast that have come out to date. Chromecast (third generation), Chromecast Ultra, and Chromecast with Google TV are the three distinct kinds of Chromecast devices being made by Google as of now.
With these newer versions and updates, not to mention the growing popularity of the Google Chromecast device itself, some technical problems are bound to come up. One such error is the “Google Chromecast source not supported” error. This article will elaborate on how to fix this error using multiple ways.
Contents
What is the “Google Chromecast Source not Supported” Error?
The “Google Chromecast source not supported” error means that the device that you are using to cast media onto your TV is not recognized by the device. This error could sometimes occur due to some misdemeanor reasons. This could include using an old version of the Google Chromecast device that your TV might not support.
You can also make sure that the Chromecast device is connected to the TV’s HDMI port and the connection to the power outlet is not loose. Another reason could be due to the mirror option being disabled on your device. However, it is also possible that you could be using your Google Chromecast device for a while. The “Google Chromecast source not supported” error comes up suddenly and unexpectedly.
To fix this error in such cases we have listed down step-wise guides on various techniques. To know more, keep reading:
1. Check your Network
If your Chromecast cannot connect to the WiFi during the setup process, the first and foremost thing to do is to check your Wi-Fi network connection. Perhaps there is some issue with the connectivity of your internet connection. Your Google Chromecast may have accidentally disconnected from the Wi-Fi network of the device from which you are streaming from. In such a situation, various errors can come up, including the one under discussion, which is the “Google Chromecast source not supported” message prompt.
2. Enabling Mirroring
According to Google, the new updates for the Google Chromecast have led towards the disabling of the mirroring option. This is why the error never occurred before: the feature was never disabled by default, some updates in the software led to it.
Here is how you can fix it to remove the “Google Chromecast source not supported” error:
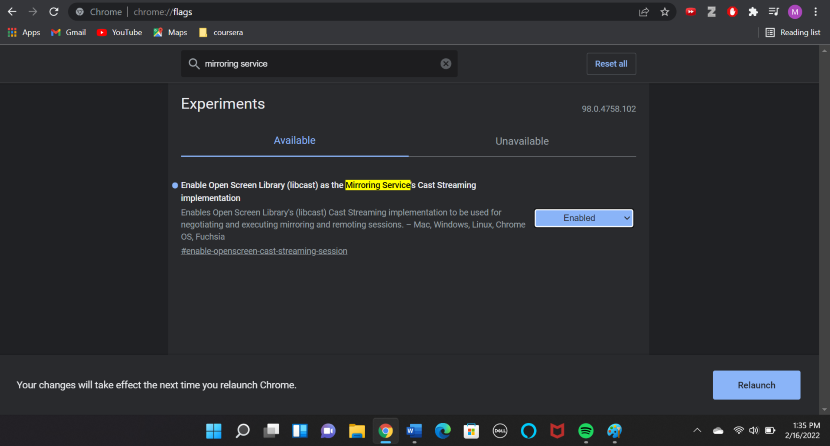
- Open your Google Chrome browser and go to chrome://flags.
- In the search bar, search Mirroring Service. You can also press the Ctrl + F buttons on your keyboard to open Google Chrome’s search feature.
- When you locate the right option, you have to make sure that it is not disabled. If it is, simply click on it and select Enabled from the drop-down menu.
- To activate the changes, you have to restart the Google Chrome browser. This should be enough to fix the ‘”Google Chromecast source not supported” error.
3. Enable the Cast Media Route Provider
Just like in the above-mentioned method to fix the “Google Chromecast source not supported” error, you can try enabling another feature. This one is called the Cast Media Route Provider.
The steps are pretty much the same, here is a guideline on how to enable this feature:
- Open your Google Chrome browser and go to chrome://flags.
- In the search bar, search Cast media router provider. You can also press the Ctrl + F keys on your keyboard to open Google Chrome’s search feature.
- When you locate the right option, you have to make sure that it is not disabled. If it is, simply click on it and select Enabled from the drop-down menu.
- To activate the changes, you have to restart the Google Chrome browser. This should be enough to fix the “Google Chromecast source not supported” error by your Google Chromecast device.
4. Restarting your Computer, Google Chromecast Device, and the Wi-Fi Router
Some users have reported that they were able to successfully connect their Chromecast device to their computer after restarting the device. Perhaps the restart gives it the reboot to remove any occurring bugs. For added measures, users can try to restart their computers and Wi-Fi routers as well. This should clear all the errors in all the concerned networks.
Here are the steps you need to follow:
- You can restart the Chromecast device by turning the TV off and then disconnecting the device. You can unplug the cord for a minute or two and then plug it back in. You can also try plugging it back in after restarting the rest of your devices.
- Next, you can try restarting the Wi-Fi connection. If you have a modem and a router, you should turn off both of these devices. You can start by turning it off using the Power button and then unplugging them. Plug the devices back in after a minute or two.
- Lastly, you restart your computer. Which is pretty simple and probably needs no tutorial (But just in case, go to the Start menu, and click on the Power button which will lead to the Restart option).
- As an additional resort, shut down and reopen the app you are trying to cast.
- You can also try unplugging the power cable for 3 seconds and then put it back in to restart your Chromecast device.
It could be that the problem is not in your Chromecast device but in the app that you are using. You can test this theory by casting a different application. If that particular one works, you can try restarting the app you actually desire to cast. If the app is open on some Android devices, you can do this by going to the Application Manager.
However, it is important to mention that if the app you are trying to reset does not store the user settings online, it might erase all of the default settings as well. If not, you might have to log in to your app with all of the details, including your email/username and password, once again.
Since we have established this, let’s get to the guidelines on how you can restart this app:
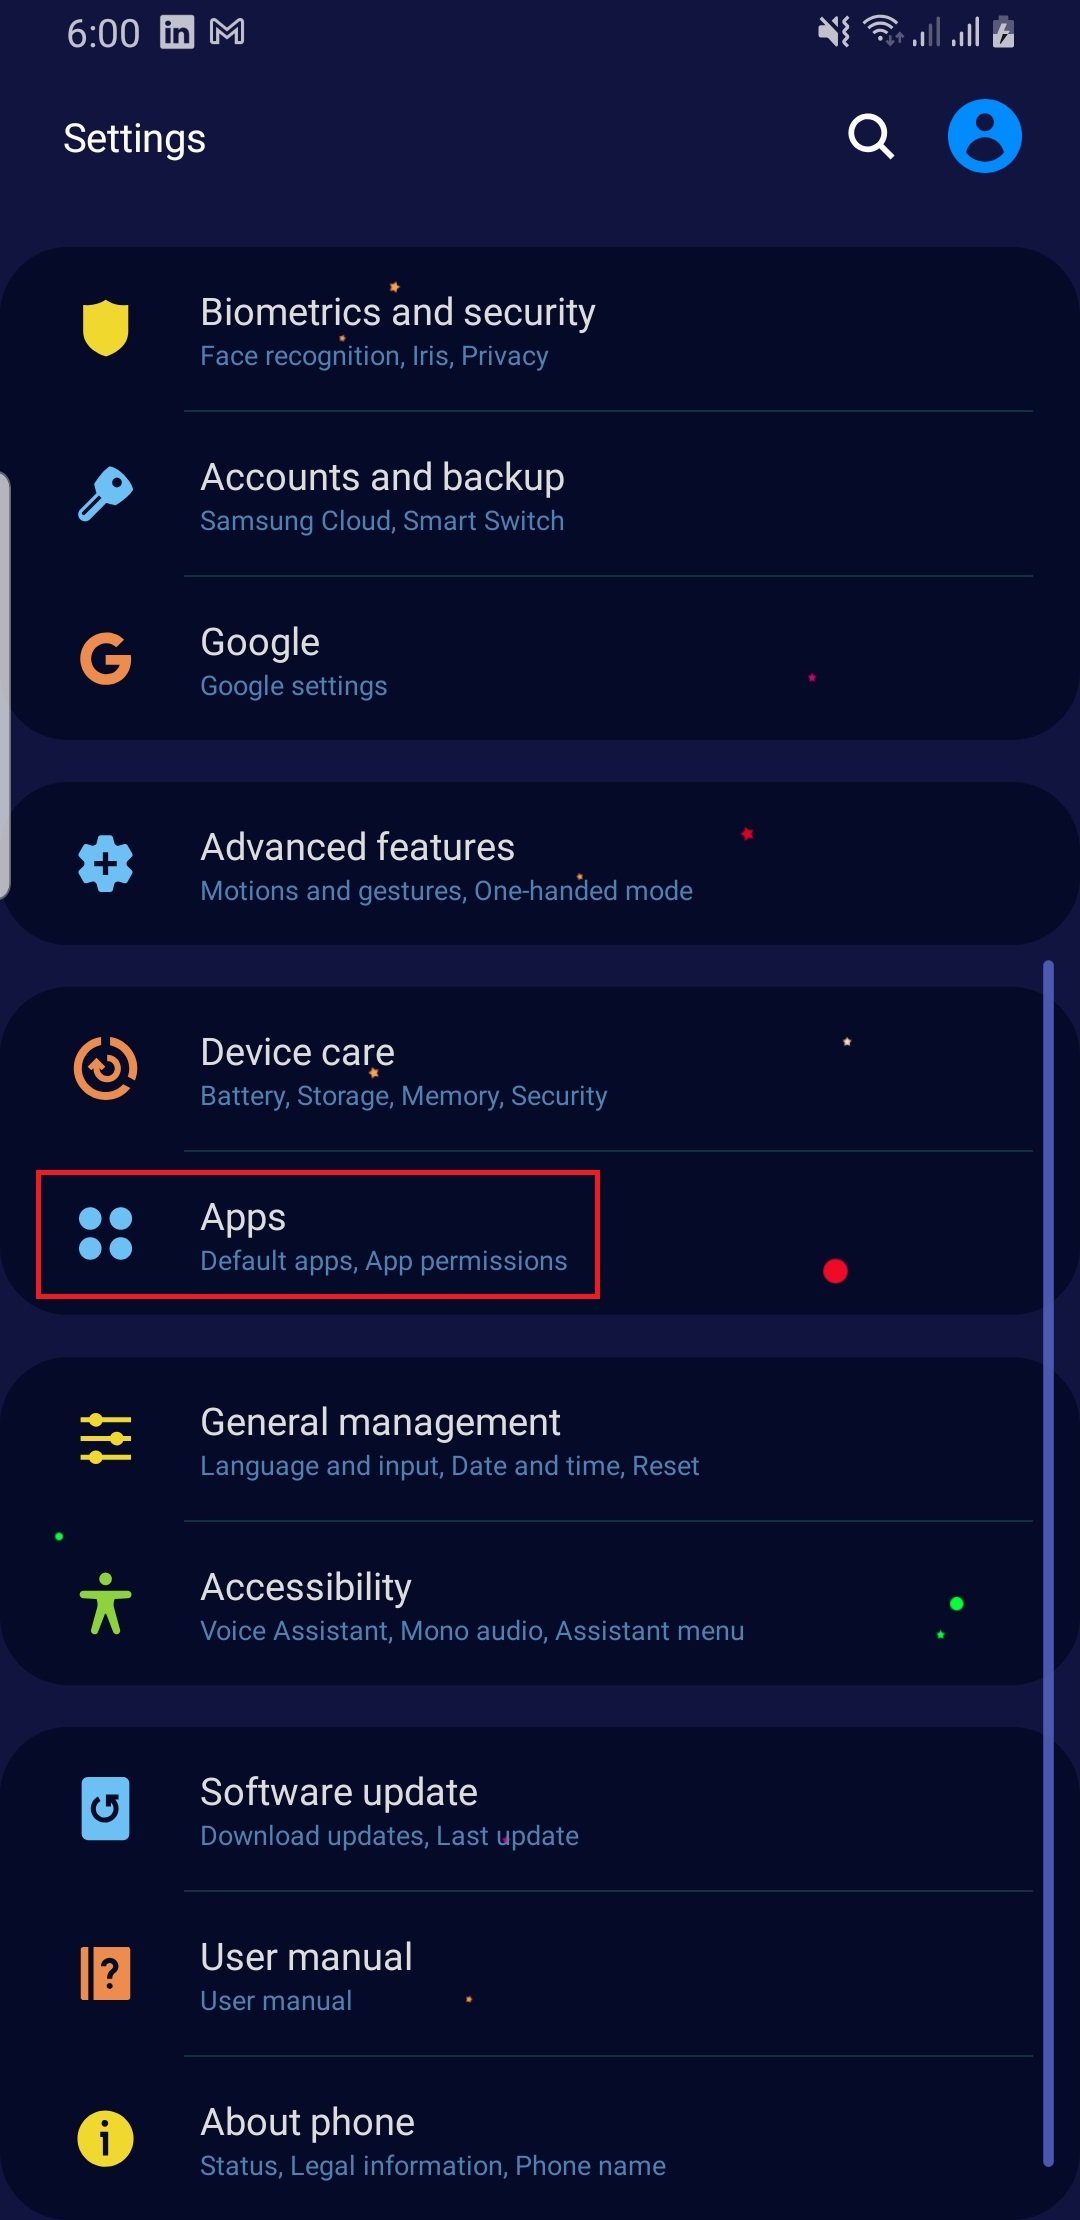
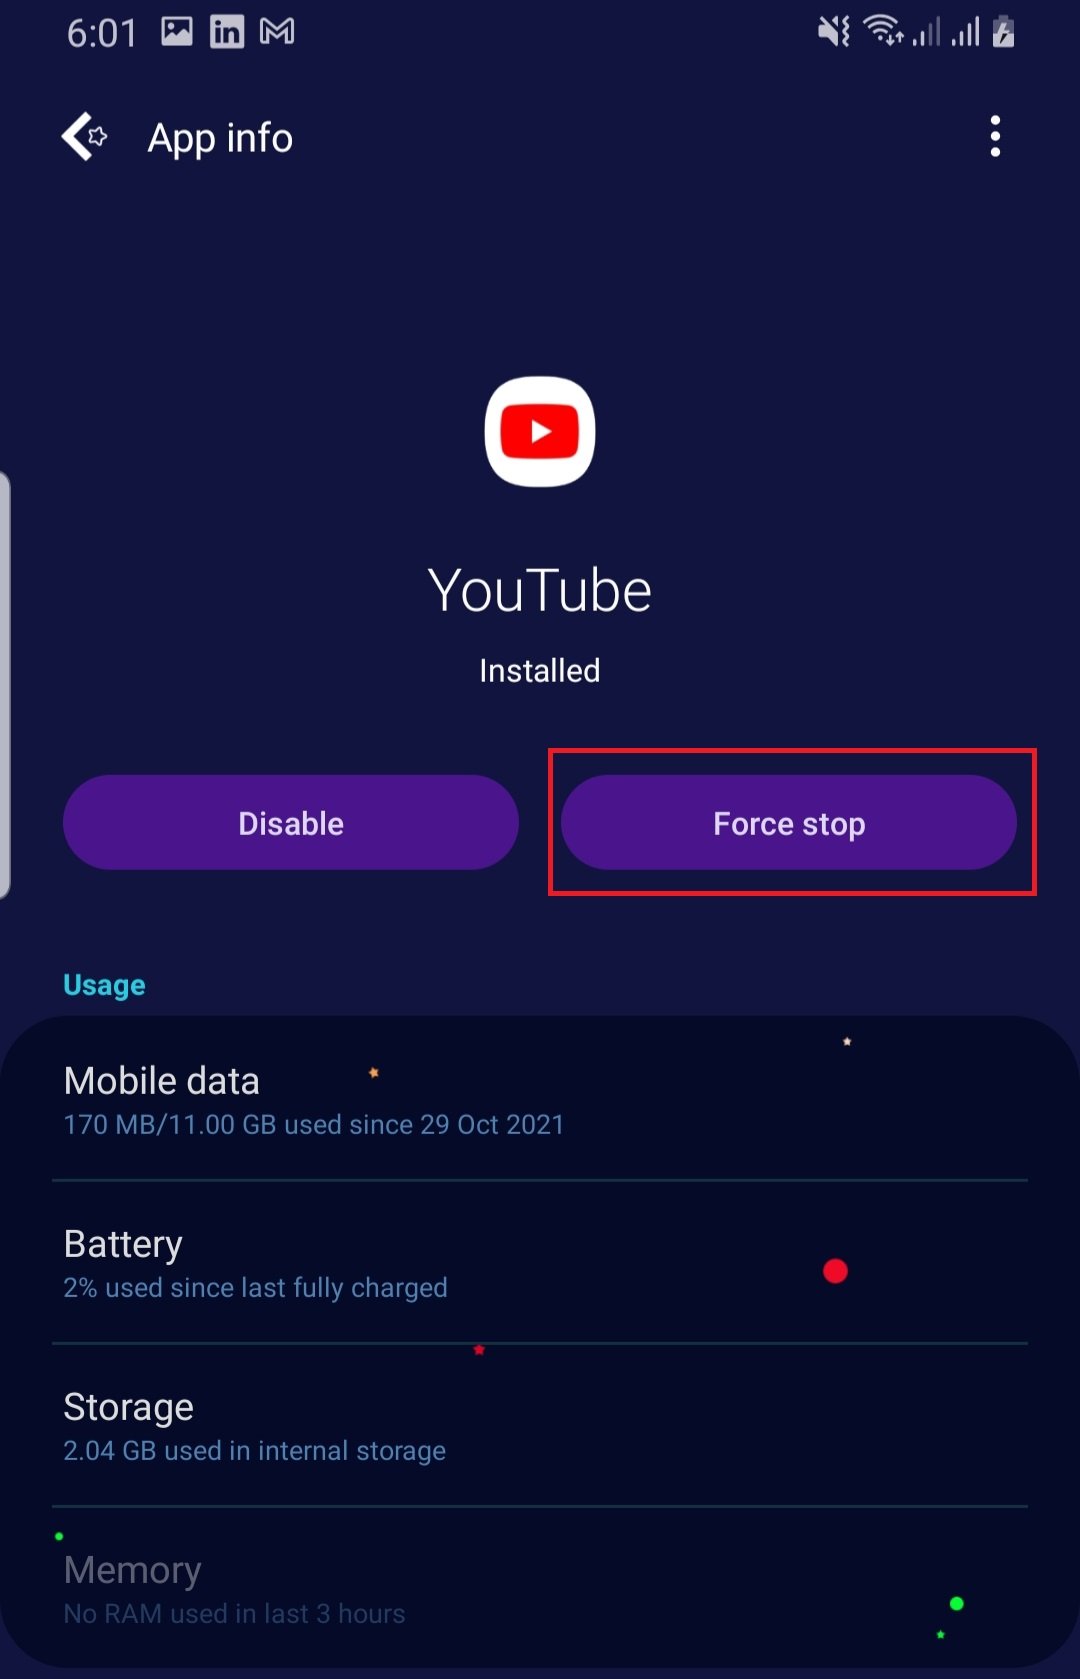
- Open the Apps folder on your mobile phone and go to the particular app you are trying to cast.
- Find the Application manager. This depends on which version of the Android device you are using.
- For older versions: Tap the General tab, and then tap Application’s manager.
- For newer versions: Scroll down the Settings tab. You will either find the Application’s manager or Apps option.
- If you are clicking the Apps option, your can scroll down the tab that has now opened and find the Application’s manager.
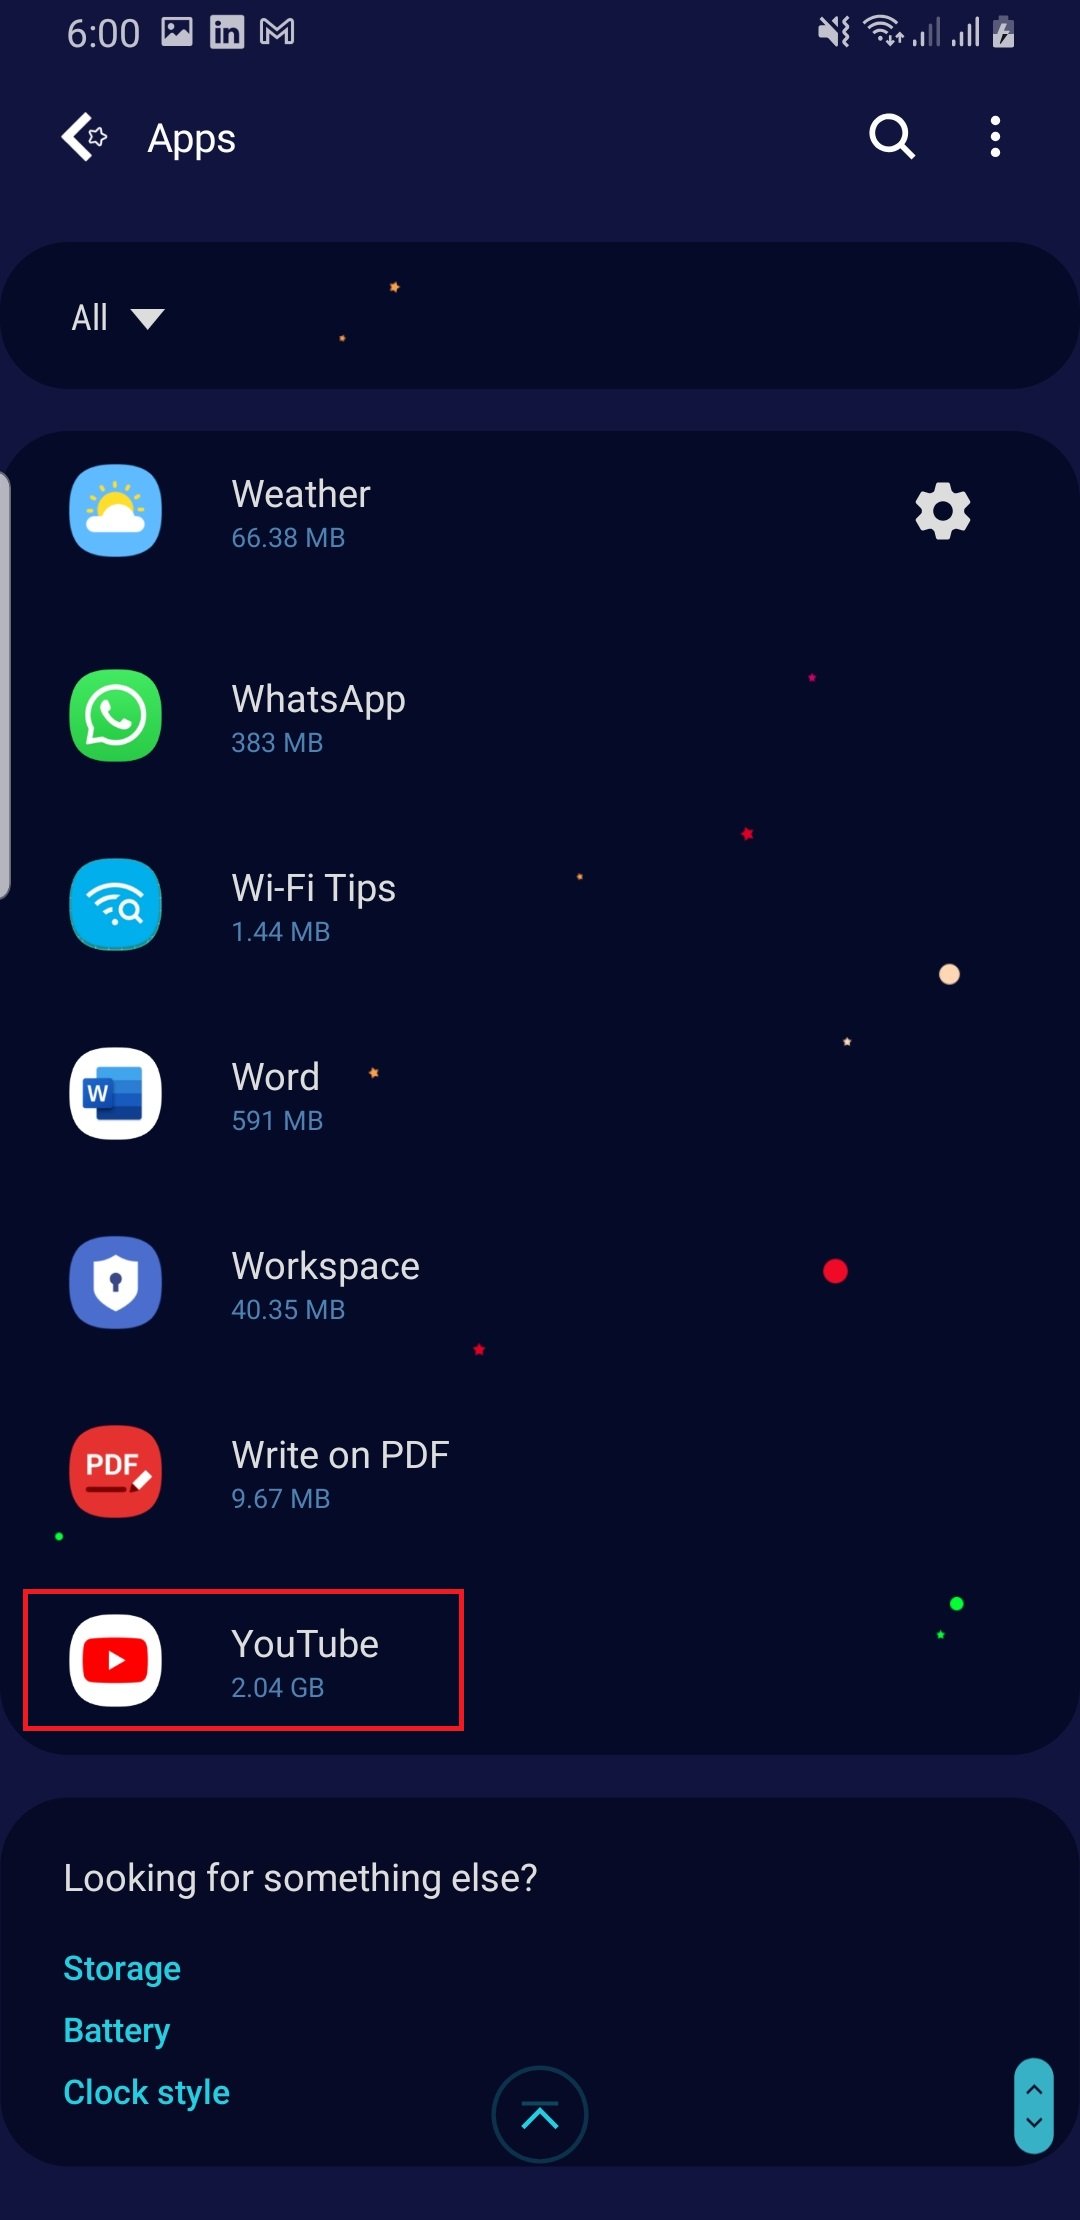
- From the list of apps, locate the one you wish to cast on your Chromecast and is causing the errors.
- Tap Force Stop.
- Now tap on Cache and tap Clear Cache.
- Next tap on Storage and then Clear Data.
- This should restart your app from the very beginning and should fix any possible bugs or errors.
- As an additional resort, turn off ant Ad-Blockers and VPN.
The methods mentioned should be enough to fix the “Google Chromecast source not supported” error but if it persists then we may proceed with the other possible solutions.
What do ad-blockers have to do with your Chromecast, you say? These software work by blocking some parts of the Java script which could disturb the casting script as well. Users have reported the disabling of ad-blockers as one remedy for fixing the “Google Chromecast source not supported” error.
You can turn your ad-blockers off by following the step-wise guide mentioned below:
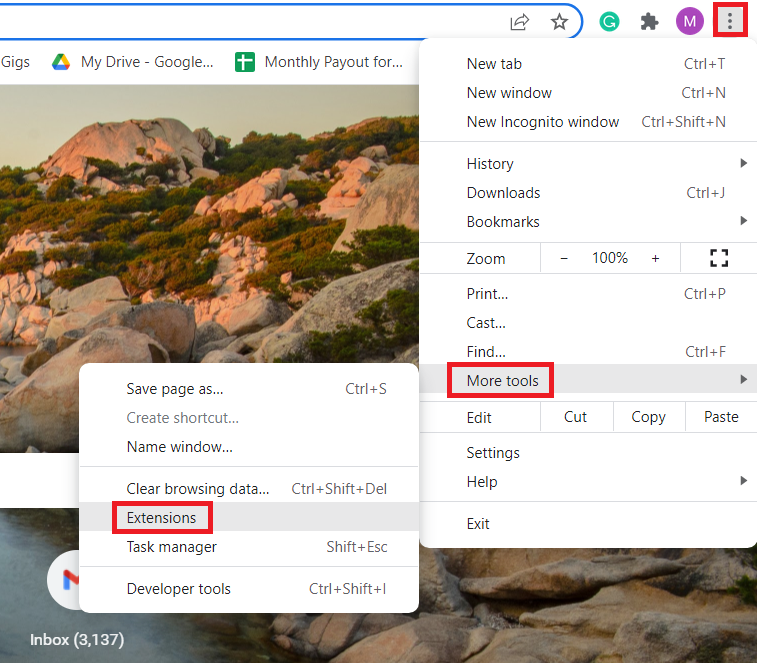
- Open your Google Chrome browser.
- Click on the three dots at the top-right corner of the screen.
- From the drop-down menu, go to More tools.
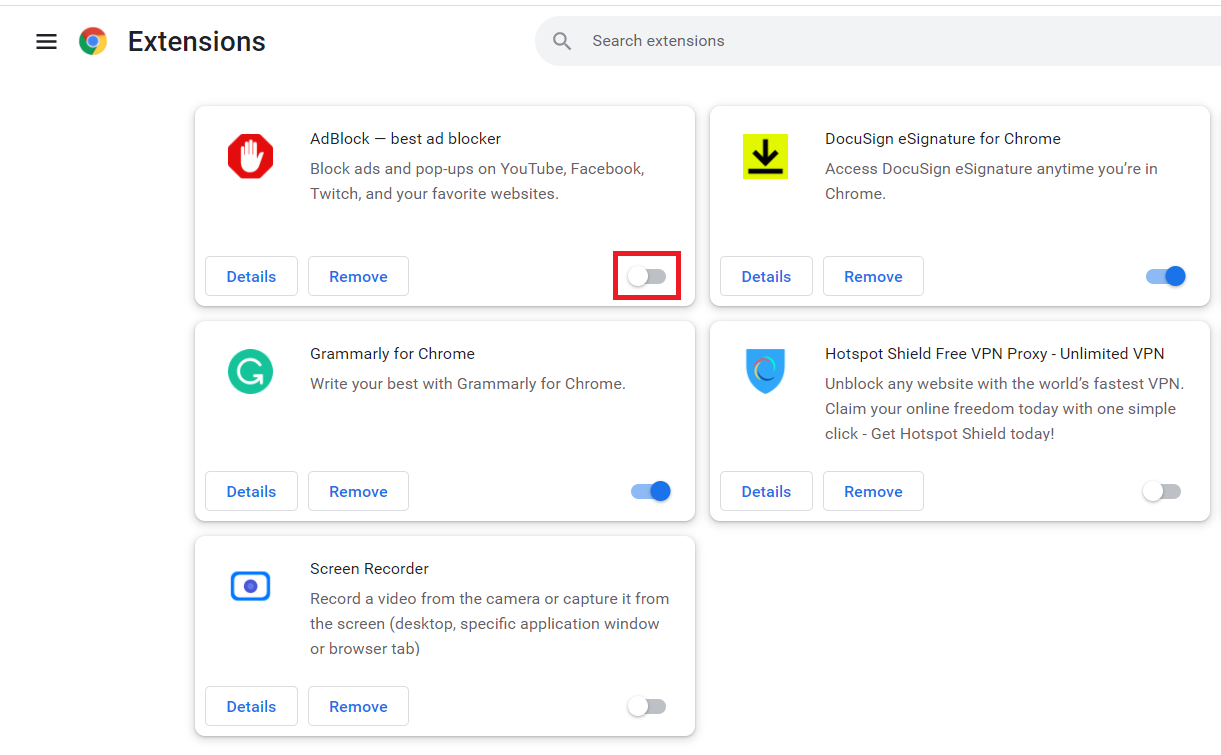
- A new side menu will appear. From the list of options available on the left, click on Extensions.
- From the window that now appears, find the ad-blocker you are using and toggle it to grey. This means that the ad-blocker is now switched off.
- Refresh or restart your Google Chrome browser and try to connect your Google Chromecast to your device now.
Another factor that can weigh in on prompting the “Google Chromecast source not supported” error, is your VPN. What these VPNs do is hide your IP address and link to any other country with their IP addresses, making your connection unrecognizable. This could hinder your Chromecast’s ability to connect with the casting device.
To disable your VPN service, open your VPN software and simply hit the disconnect button. Make sure that the VPN is not running in the background by opening the Task Manager. (Press Ctrl+Alt+Delete simultaneously to open the task manager). You can also try uninstalling the service altogether to see if that helps fix the error.
5. Update your Google Chrome Browser
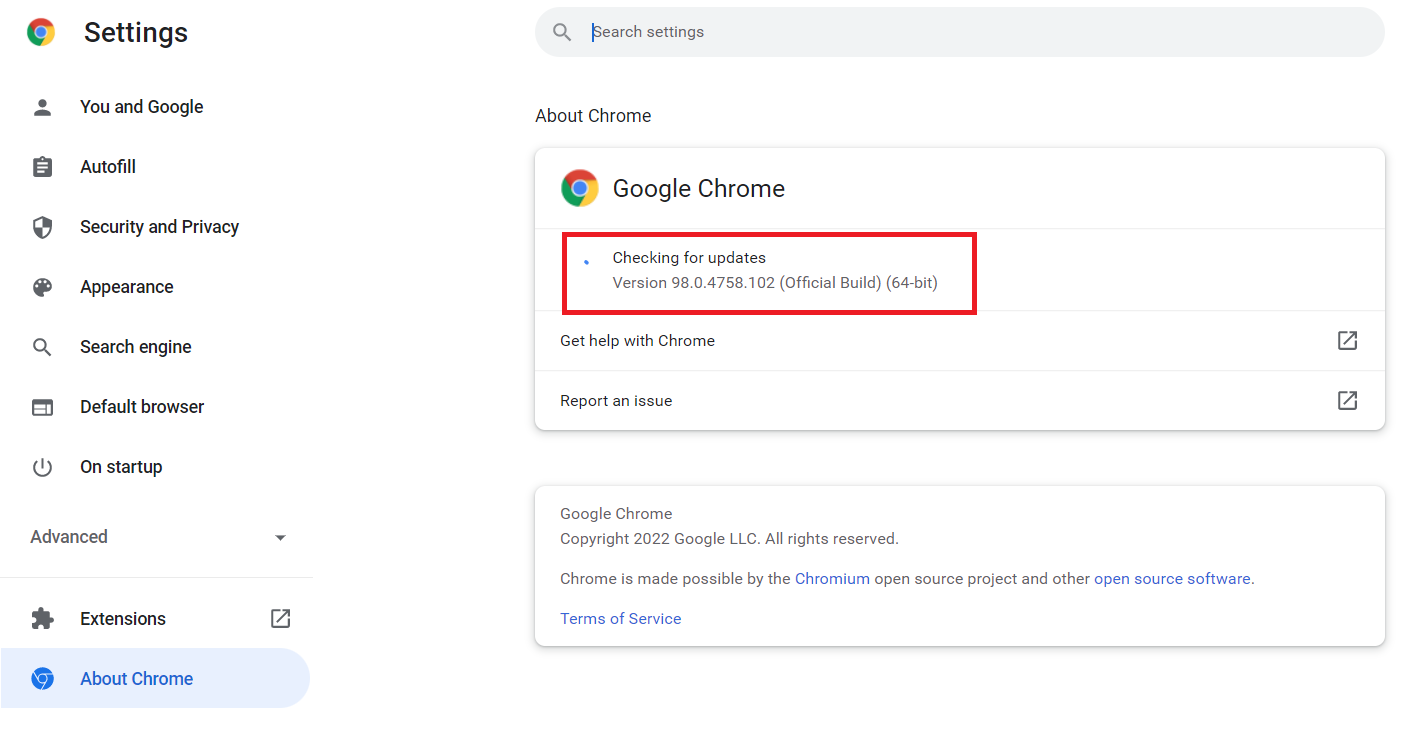
If you have not manually updated your Google Chrome browser, it might be time to check whether that is the reason for your “Google Chromecast source not supported” recurring error. Sometimes the auto-update feature fails to do that and you have to install the updates manually. If your Google Chrome is not updated, glitches and errors could occur.
Here is how you can check and (if needed) update your Google Chrome browser:
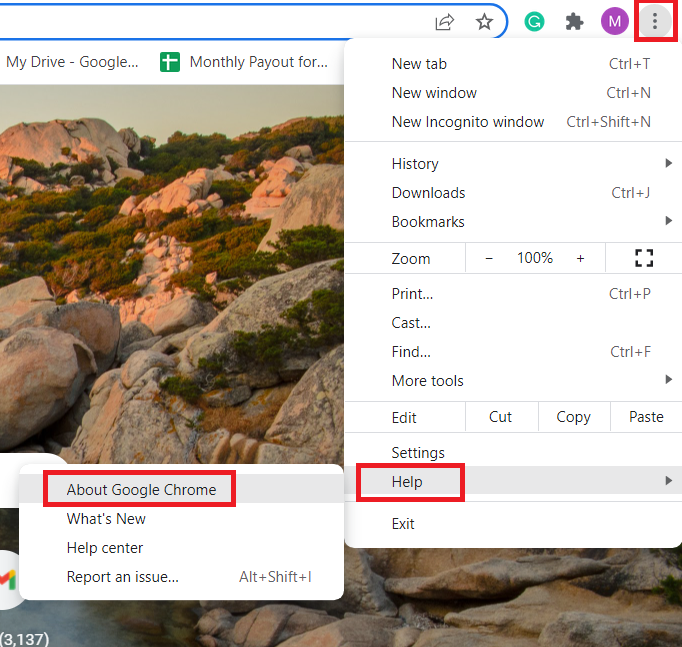
- Open your Google Chrome browser and click on the three dots on the top-right corner.
- From the drop-down menu, click on Help and then find the option for About Google Chrome.
- Once you click on that, an About Chrome window will appear. This page will automatically search if there are any new updates. If the page manages to find them, you will see a Download.
- Once you click on the download button, the updates will start to download.
- As your browser is updated, restart it to activate the changes.
6. Try Factory Resetting your Chromecast Device
If push comes to shove and you are still receiving the “Google Chromecast source not supported” error, your final bet is to reset the Chromecast to factory settings. We sincerely hope, it does not come to it because factory resetting your device will make you lose all the data and cache saved. In simpler words, your device will be as if it was never used. This means it will also clear out any bugs or errors in the device.
Following are the step-wise guides on how to factory reset your first and second-generation Chromecast devices:
i. For the First-Generation Chromecast devices
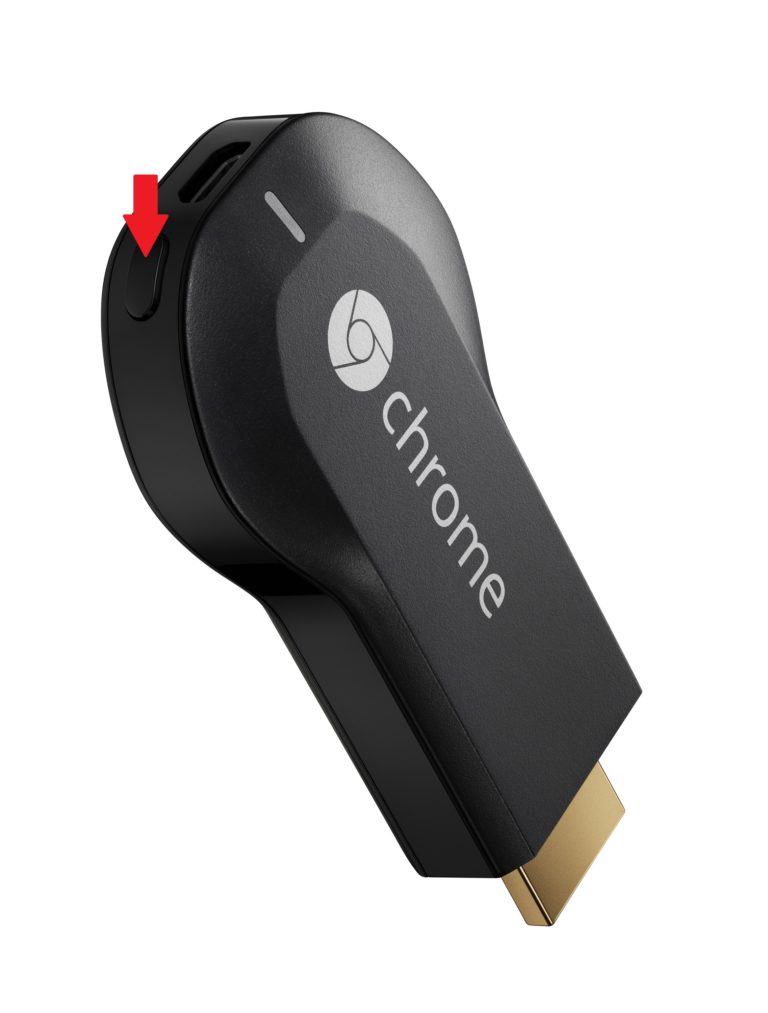
- As your Chromecast device is plugged into your TV, find and press the power or the reset button on your Chromecast device. Do this for 25 seconds till the red lights start flashing.
- Once the flashing lights turn white, the TV screen will turn blank. After this, you can release the button.
- Now your Chromecast device will initiate its rebooting sequence. This will take a few moments, so stay patient till it finishes.
- As that is done, your factory settings are reset and your device is now as good as new.
Alternate Method:
You can also factory reset your Chromecast device using the Google Home App. The option is available for both Android and iOS devices. The reset process through it is quite simple. All you have to do is open the Google Home app > Your Chromecast Device > Settings > More > Factory Reset > Factory Reset.
ii. For the Second-Generation Chromecast or Chromecast Ultra Devices
- As your Chromecast device is plugged into your TV, find and press the power button on your Chromecast device. Do this till the light starts blinking orange.
- Once the flashing lights turn white, the TV screen will turn blank. After this, you can release the button.
- Now your Chromecast device will initiate its rebooting sequence. This will take a few moments so stay patient till it finishes.
- As that is done, your factory reset is completed and your device is now good as new.
