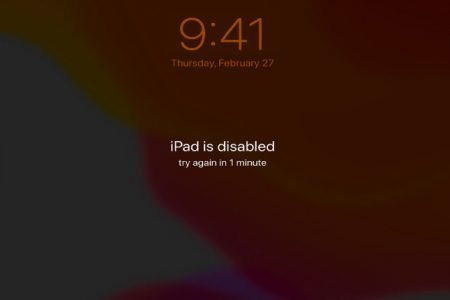
Did your iPad ever say something that sounds as confusing as “iPad is disabled, Connect to iTunes”? If so, and you don’t know how to fix the issue, you have come to the right place. iPad says such a thing when the user enters incorrect password for more than the given limit. Not only does it block them from unlocking, but also deletes all their data.
Contents
Fix your disabled iPad
First and foremost, log into the iTunes with the account associated with the device. Then go to My Account and you will find the device there i.e. your iPad that’s disabled. There are a few alternative methods that would help you fix the issue of a disabled iPad.
Method 1
- Connect your iPad to your computer/laptop through a USB cable and then open iTunes.
- Then look for the device on the left corner of iTunes and select it. It should prompt you with two options; Back Up Now or Restore Backup.
- If, however, the device does not appear, there is another method to try connecting the device to iTunes.
Method 2
- Power off the device by pressing and holding the power button and swiping to switch off. Make sure that no cables are attached to the device.
- Then press and hold the home key and connect to the computer.
- Keep holding the button until the screen says “Connect to iTunes”. Your device should now be listed in iTunes.
Method 3
If the second method doesn’t work as well, there is another way to connect the device to iTunes.
- Make sure all the cables are disconnected form the iPad.
- Press and Hold the Sleep/Wake button until the Slide to power off comes. Switch it off but do not release the Sleep/Wake button.
- Connect the iPad to the computer now. It whould appear on the device.
Method 4
There is one final attempt if none of the above work.
- Plug your iPad into a power outlet.
- Press and hold the Sleep/Wake button until the screen says Slide to Power Off. Slide it and switch it off.
- Press and hold the home button and connect it to the computer.
- Keep holding the home button until you see the Apple logo appear or disappear on the screen. Then ‘Connect to iTunes’ screen will appear.
- It may take up to 10 minutes of plugged in time before being registered to the iTunes. You must wait and let it connect.
- If the iPad connects to the computer, you will get an option to either restore it, or update it.
Restoring iPad with iCloud
If you don’t have a computer to connect your iPad to, you can always try to restore it using iCloud on your iPhone. To do that, follow the steps:
- Open iCloud on your phone browser and sign in with the Apple credentials. Make sure you use the right password this time.
- Then click the Find iPhone option and select ‘iPad’ under the Add devices on the top (this only works when the Find My iPad feature on your iPad was turned on before being disabled).
- Then click Erase iPad option and confirm the action by entering the credentials required and you’re all done.
Restoring iPad with TunesKit
TunesKit is a third party iOS repairing tool that performs the task of restoring your iPad without much hassle. You can restore the iPad or any other iOS device using this tool without having to enter passwords or other credentials. Follow the steps below to restore the iPad using TunesKit:
- First, plug in your iPad to a computer using a USB cable.
- Download the right version of TunesKit iOS System Recovery and install it.
- Open the program and click “Enter Recovery Mode” on the left to put the iPad into recovery mode.
- Click Start to initiate.
- Then choose a recovery mode to fix the disabled iPad issue.
- The Advance Mode is the right option for you choose.
- Confirm the device info and correct if there are any errors.
- Then click the Download button to download the approximate iOS firmware package for your iPad.
- The download will take some time so you need to wait until the process is completed. Once it has been completed, click the Repair button to immediately resolve the disabled iPad issue.
Now you have all the answers to the question, ‘iPad is disabled, connect to iTunes?’


