How to format a USB on mac and windows
 Image Source: Bullfrag
The compatibility between Windows and Mac has always been a conundrum. Windows users cannot go smoothly with Mac and Mac users receive the same level of bewilderment on Windows. One of the main differences is the file system, as the macOS has been equipped with HFS+ file system while the Windows, with NFTS. This difference in the file system causes issues when you are trying to use the same USB drive on both platforms. More specifically, if your USB drive was initially formatted to NTFS on Windows or HFS+ on a Mac, you are likely to suffer complexities and limitations as the data on your drive would not be accessed on both platforms. Hence, knowing how to format a USB on Mac and Windows is very essential.
There are ways, however, which you can use to solve this problem of incompatibility. exFAT is a file system that formats the USB drive and makes it fully compatible with both Mac and Windows. There are other file systems available for that purpose but the most suitable and widely equipped is the exFAT. It has no limit when it comes to the maximum file size and partition size. It works with both, Windows and macOS perfectly.
Moving ahead, it’s important to know what file system the USB drive uses in order to learn how to format the USB drive.
Contents
File system compatibility
| File system | Windows | macOS |
| HFS+ | No | Yes |
| NTFS | Yes | No |
| FAT32 | Yes | Yes |
| exFAT | Yes (no limit) | Yes (no limit) |
How to check a USB drive’s file system?
Before you find out how to format a usb on Mac or Windows, knowing what file system you are on is very important. Initially, plug in your USB drive into the USB port and ensure that the drive is detected. That works differently for both Mac and Windows. A complete set of instructions for both is given below:
On Mac
As you insert the USB drive into the device, the USB drive icon will appear on the desktop. Then,
- Right Click on the icon.
- Select Get info.
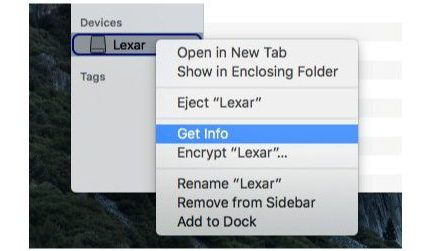
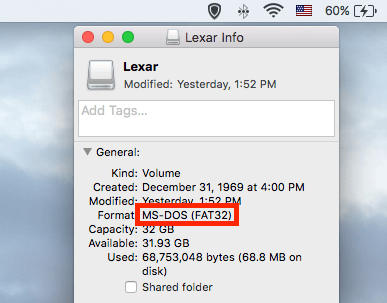
In case the icon does not show up, you can always click Finder on the sidebar menu and select your USB from the given device’s folder. Once the info pops up, look at the General > Format. This will show you the current file system the USB is on. It generally says FAT32 for Macs.

On Windows
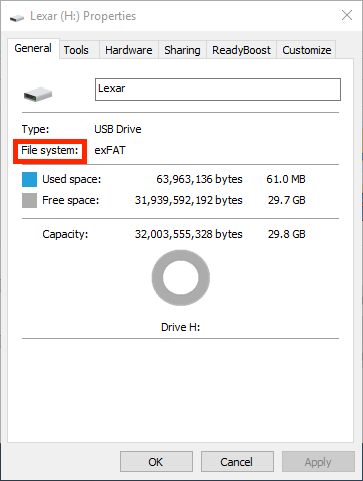
If you are a Windows user, you can follow the instructions given below in order to learn which file system you are currently on:
- Go to This PC.
- Locate your USB drive under the Drives and Devices.
- Right click on the USB drive shown.
- Select Properties.
- Go to the General folder and check under Format. You will find the type of file system you are currently on.

How to format a USB drive to exFAT?
After learning the type of file system you are currently using, the next step is to Format the USB drive to exFAT. The complete set of instructions for both Mac and Windows are given below:
On Mac
The disk utility app for macOS has been updated since the OS X 10.11 El Capitan, and the user interface is slightly different from the previous versions. Let’s see how to format the USB drive to exFAT.
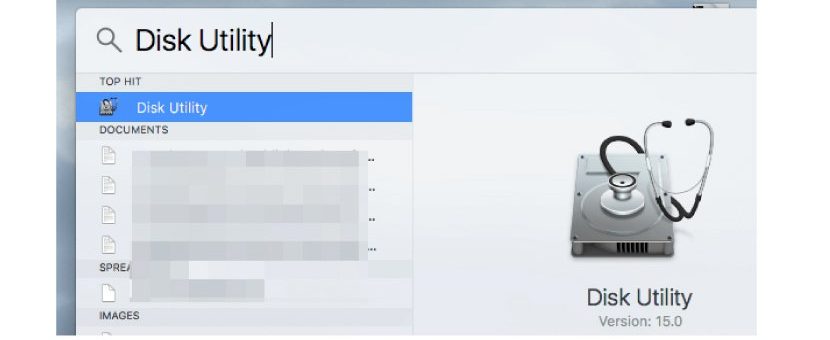
- Open Disk Utility. You can open it directly by searching it from Spotlight and clicking the Top Hit. Alternatively, you can search for the App in the Finder > Applications > Utilities > Disk Utility.
- Under the External tab, highlight your USB drive.
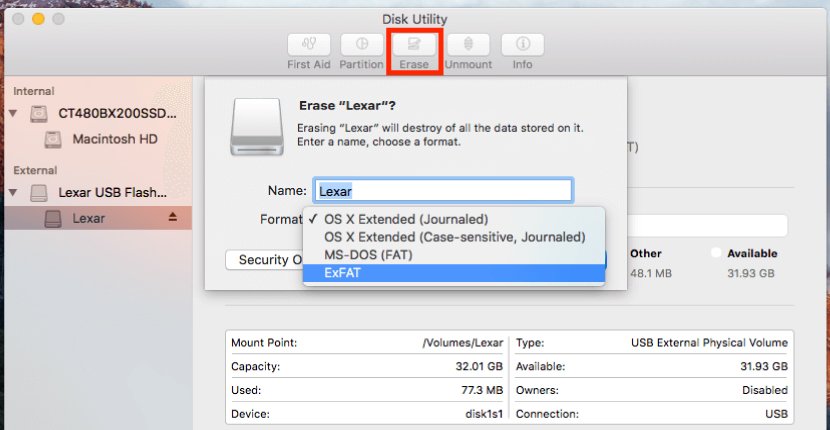
- Click the Erase button. The window pops up with options for the format.
- Select the exFAT format. You can also change the name of the drive if you want.
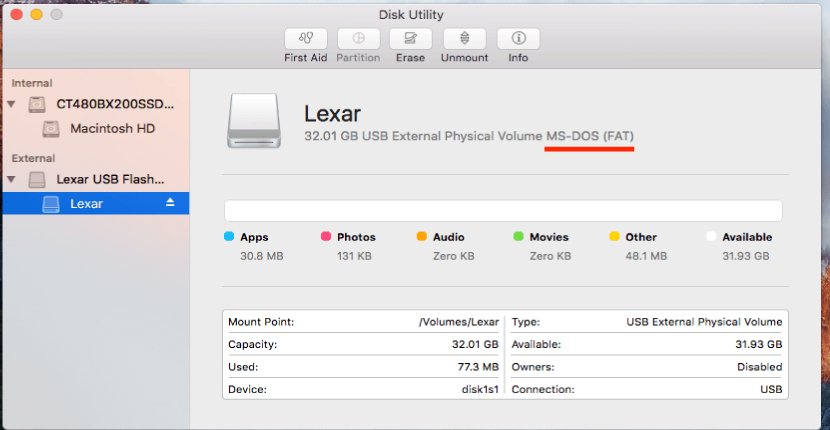
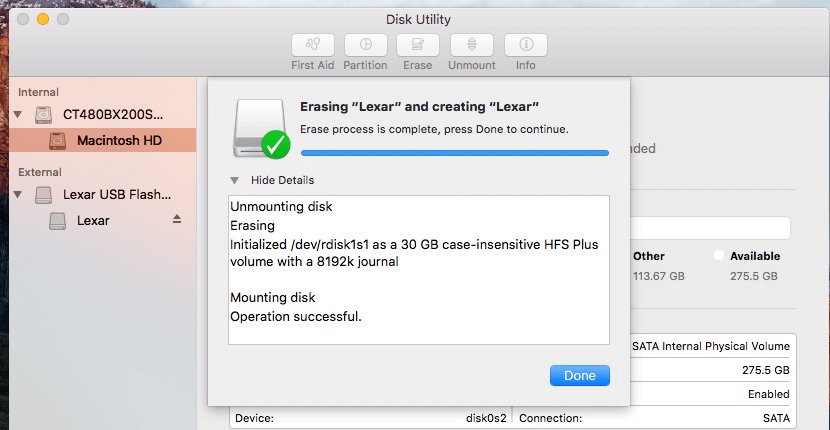
Always remember to back-up the data before going through this process. You can confirm that your drive has successfully been shifted to exFAT file system by going to the Disk utility again.
On Windows PC
Insert the USB Drive into the computer and then follow the steps given below:
- Select your USB drive from under the Drives and Devices section in This PC and Right Click on it.
- Select the Format option.
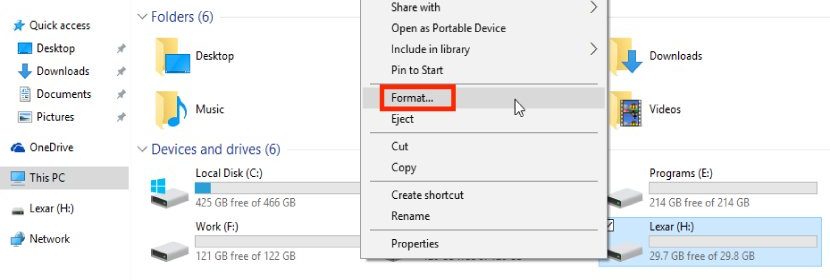
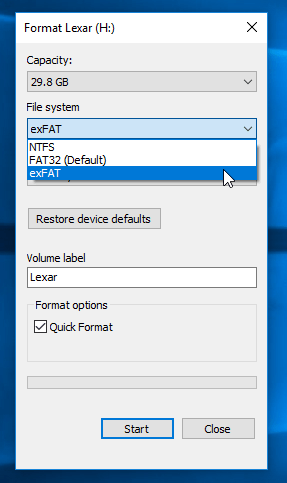
- A window will pop up from where you need to select the File system i.e. exFAT. You can also change the drive name from the Volume label.
- Click Start to continue.
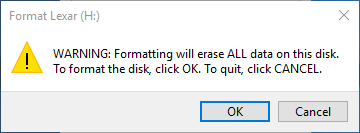
You will see a warning informing you that all the data in the drive will be erased. In order to protect your valuable data from permanently disappearing, you need to make sure that you have backed up the data prior to the formatting process.

Once the drive is successfully formatted, hit OK and there you go! Now you know all the basics of how to format a USB on Mac and Windows, both.